Beginner’s Guide to Buying a Used Car: Simple Checks to Avoid Expensive Mistakes
Buying a used car doesn’t have to be scary. This step‑by‑step guide walks beginners through simple checks, questions, and tools that help you avoid hidden problems and costly surprises....

Buying a used car is one of the fastest ways to save money compared with buying new, but it is also one of the easiest ways to overpay or inherit someone else’s problems. The good news: you do not need to be a mechanic to avoid most bad cars. You just need a plan and a few simple checks.
- 1. Step 1: Set a Realistic Budget (Including Hidden Costs)
- 2. Step 2: Choose the Right Type of Used Car for Your Needs
- 3. Step 3: Shortlist Cars Online and Filter Out Bad Listings
- 3.1. What to Look For in Online Listings
- 3.2. Red Flags in Online Listings
- 4. Step 4: Check the Vehicle History and Basic Paperwork
- 4.1. Simple Paperwork Checks
- 5. Step 5: Do a Simple Walk-Around Inspection (No Tools Needed)
- 5.1. Exterior Checklist
- 5.2. Interior Checklist
- 6. Step 6: Basic Under-the-Hood Checks for Beginners
- 7. Step 7: Test Drive with a Purpose
- 7.1. How to Structure Your Test Drive
- 8. Step 8: Scan for Trouble Codes (If Possible)
- 9. Step 9: Get a Professional Pre-Purchase Inspection
- 10. Step 10: Negotiate and Close the Deal Safely
- 11. Summary and Next Steps
This beginner-friendly guide walks you through each stage of the process, from shortlisting cars online to doing a basic inspection and test drive. Follow these steps and you will dramatically reduce your chances of buying a money pit.
Step 1: Set a Realistic Budget (Including Hidden Costs)


Before you look at any car, decide what you can truly afford. The purchase price is only part of the story. You also need to budget for taxes, registration, insurance, and the first round of maintenance.
Use this simple breakdown to set your budget:
- Purchase price: Aim for 80–90% of your total budget.
- Immediate maintenance: Reserve at least 10–15% for things like oil change, filters, wiper blades, and possibly tires or brakes.
- Inspection costs: Plan for a pre-purchase inspection by a mechanic, usually $100–$250.
- Registration and taxes: Check your local DMV or licensing authority for estimates.
Also think about ongoing costs. A cheap luxury car can be far more expensive to maintain than a slightly pricier compact with inexpensive parts. If you’re new to car ownership, prioritize reliability and low running costs over fancy features.
Step 2: Choose the Right Type of Used Car for Your Needs
Next, decide what kind of car actually fits your life. This helps you ignore flashy listings that are wrong for you and focus on cars that will be cheaper and easier to live with.
Ask yourself these questions:
- How many people do I usually carry? If it’s just you and one passenger, a small sedan or hatchback is enough. Families may need a compact SUV or minivan.
- What kind of driving do I do? Mostly city driving favors smaller, fuel-efficient cars. Long highway commutes may benefit from a larger, more comfortable car.
- Do I really need all-wheel drive? AWD helps in snow and dirt, but it adds complexity and cost. If you live in a mild climate, front-wheel drive is usually fine.
- How important is fuel economy? Gas prices add up quickly. Check EPA fuel economy ratings for the models you’re considering.
Once you’ve narrowed down the type of car, research common issues and reliability. Owner forums and long-term reviews can highlight patterns like premature transmission failures or rust-prone areas. This helps you avoid models known for expensive problems, such as chronic catalytic converter issues that can trigger codes like OBD2 Code P0420: Catalyst System Efficiency Below Threshold.
Step 3: Shortlist Cars Online and Filter Out Bad Listings
Most used-car shopping starts online. Instead of clicking on every shiny car, use filters and a checklist to quickly weed out bad candidates.
What to Look For in Online Listings
- Clear, detailed photos: You should see all sides of the car, interior, engine bay, and odometer. Blurry or limited photos can be a red flag.
- Accurate mileage: Compare the mileage to the car’s age. Around 10,000–15,000 miles per year is typical. Much higher may mean heavy use; much lower may need extra verification.
- VIN listed: The Vehicle Identification Number lets you run history reports and check recalls.
- Maintenance details: Look for mentions of recent oil changes, brake work, tires, or timing belt replacement.
- Ownership history: “One-owner” cars with records are often safer bets than cars that have changed hands many times.
Red Flags in Online Listings
- Salvage or rebuilt title: These cars were previously declared a total loss by an insurance company. They can hide serious structural or electrical damage.
- “Needs nothing” but no records: Big claims with no proof are not helpful. You want documented work, not just words.
- Inconsistent information: If the description says “no accidents” but the photos show mismatched paint or body gaps, be cautious.
- Very low price vs. market: If it’s dramatically cheaper than similar cars, assume there is a reason and investigate carefully.
Use several listings of the same model and year to understand the normal price range. This helps you recognize when a seller is asking too much or when a price is suspiciously low.
Step 4: Check the Vehicle History and Basic Paperwork
Before you drive across town to see a car, ask the seller for the VIN and any service records. This lets you catch major issues early.
Simple Paperwork Checks
- Confirm the title status. Ask if the title is clean, rebuilt, or salvage. Avoid salvage/rebuilt titles unless you fully understand the risks and plan to keep the car long term.
- Check for liens. Make sure the seller actually owns the car outright or is transparent about any remaining loan.
- Review maintenance records. Look for regular oil changes, brake service, and major items like timing belt or transmission fluid changes at the recommended intervals.
If the seller refuses to share the VIN or basic paperwork, it’s usually best to walk away. There are plenty of cars for sale; you don’t need to chase a suspicious one.
Step 5: Do a Simple Walk-Around Inspection (No Tools Needed)
When you see the car in person, start with a slow walk-around before you fall in love with the color or the stereo. You can spot many serious problems with just your eyes and hands.
Exterior Checklist
- Body panels and paint: Look along the sides of the car in good light. Wavy reflections, mismatched paint, or uneven panel gaps can indicate accident repairs.
- Rust: Check lower door edges, wheel arches, rocker panels, and under the trunk lid. Surface rust is common in older cars, but holes or flaking metal are serious.
- Glass and lights: Inspect the windshield and windows for cracks and chips. Check that headlights and taillights are clear, not full of moisture.
- Tires: Use the “penny test” or tread wear indicators to see remaining life. Uneven wear can signal alignment or suspension problems. If you’re new to tire care, read the Beginner’s Guide to Tire Rotation to understand how rotation and alignment affect wear.
Interior Checklist
- Odor: Strong mold, mildew, or heavy air freshener can hide water leaks or smoking damage.
- Seats and belts: Check for tears, burns, and proper seat belt function. Make sure belts retract and latch smoothly.
- Dashboard and electronics: Turn the key to the “ON” position and confirm all warning lights come on, then go off after the engine starts. A missing or always-off check engine light can be a red flag.
- HVAC and vents: Test the heater and A/C on all fan speeds. If the cabin smells musty or the windows fog easily, you may need a cabin filter, which you can often handle yourself with a guide like DIY Cabin Air Filter Replacement.
Take your time. Sellers sometimes rush buyers through this step. A careful five-minute inspection can reveal issues that save you hundreds or thousands of dollars later.
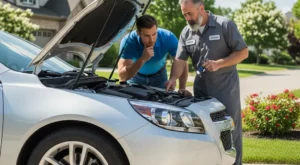
Step 6: Basic Under-the-Hood Checks for Beginners

You do not need to diagnose every possible engine problem, but a few simple checks can reveal neglect or obvious trouble.
- Fluids: With the engine off, check the oil level and color using the dipstick. Dark is normal; thick sludge or metallic glitter is not. Look at coolant in the reservoir (never open a hot radiator cap). It should be clean and roughly at the “full” mark.
- Leaks: Look around the engine and under the car for wet, oily, or crusty areas. Small seepage on an older car can be normal; fresh, wet leaks are more concerning.
- Belts and hoses: Gently squeeze hoses; they should feel firm but not rock-hard or mushy. Cracks, fraying, or missing chunks in belts are warning signs.
- Battery: Check for corrosion on the terminals and loose connections. A heavily corroded battery may soon cause starting problems.
If anything looks or smells badly burnt, or you hear loud ticking or knocking when the engine runs, consider that a major red flag. At minimum, you’ll want a mechanic to investigate before you commit.
Step 7: Test Drive with a Purpose
The test drive is not just about comfort; it’s your chance to see how the car behaves in real-world conditions. Plan a route that includes neighborhood streets, a stretch of highway, and some stop-and-go traffic if possible.
How to Structure Your Test Drive
- Start-up: The engine should start quickly without long cranking. Listen for loud rattles, knocks, or squeals right after start-up.
- Idle: The car should idle smoothly without shaking, surging, or stalling. Watch for warning lights that stay on, especially the check engine or ABS light. If the ABS light is on, review guidance like the Beginner’s Guide to the ABS Warning Light to understand what it might mean.
- Acceleration: The car should accelerate smoothly without hesitation, jerking, or loud whining from the transmission. Any slipping or delayed engagement when shifting into gear can be expensive to fix.
- Braking: Brake firmly from different speeds. The car should stop in a straight line without pulling, grinding, or vibrating through the pedal.
- Steering and suspension: Drive over small bumps and listen for clunks or rattles. The steering wheel should feel stable, not wandering or shaking.
- Transmission behavior: In automatics, shifts should be smooth and predictable. In manuals, the clutch should engage smoothly without slipping or a very high engagement point.
During the drive, turn off the radio and climate fan for a few minutes so you can listen for unusual noises. If something feels off and the seller dismisses it as “normal,” be cautious.
Step 8: Scan for Trouble Codes (If Possible)
Modern cars store diagnostic trouble codes even when the check engine light is off. If you have access to a basic OBD2 scanner, you can quickly check for hidden issues.
- Ask permission: Politely ask the seller if you can plug in a scanner. Most private sellers will agree if they have nothing to hide.
- Scan for codes: Plug the scanner into the OBD2 port (usually under the dashboard) and read any stored or pending codes.
- Interpret results: A single historic code that has been addressed may not be a deal-breaker, but multiple active codes can signal deeper problems.
If you’re new to OBD2 tools, the guide OBD2 Codes for Beginners: How to Read, Understand, and Clear Check Engine Codes at Home explains how scanners work and what common codes mean. Use that knowledge to decide whether a car is worth pursuing or better left alone.
Step 9: Get a Professional Pre-Purchase Inspection
Even if everything looks and feels fine, a pre-purchase inspection (PPI) by a trusted mechanic is one of the best investments you can make. They can spot issues that beginners and even experienced owners often miss.
- Choose an independent shop: Avoid using a mechanic recommended only by the seller. Pick a reputable shop or mobile inspector with good reviews.
- Ask for a written report: A good PPI will list current issues, upcoming maintenance, and estimated repair costs.
- Use the report to negotiate: If the car needs tires, brakes, or other work soon, you can often use that information to lower the price or ask the seller to fix items before purchase.
If the mechanic finds serious structural damage, major engine or transmission problems, or signs of odometer tampering, it’s usually best to walk away. There will always be other cars.
Step 10: Negotiate and Close the Deal Safely
Once you’ve found a car that passes your checks and the mechanic’s inspection, it’s time to talk numbers. Negotiation does not have to be confrontational; it’s just a discussion based on facts.
- Know your target price: Use your research and inspection report to decide what the car is worth to you. Be ready to walk if the seller won’t come close.
- Point to specific issues: Instead of saying “That’s too much,” say “The car needs new tires and front brakes soon, which will cost around $X. Can we adjust the price to reflect that?”
- Handle payment securely: Avoid carrying large amounts of cash. Consider a cashier’s check or meeting at the seller’s bank to complete the transaction.
- Verify the title and bill of sale: Make sure the name on the title matches the seller’s ID. Fill out a bill of sale with the VIN, mileage, price, and date.
Before you drive away, confirm that your insurance is active for the new car and that you understand any temporary registration rules in your area.
Summary and Next Steps
Buying a used car as a beginner is much less risky when you follow a structured process: set a realistic budget, research models, filter out bad listings, inspect carefully, test drive with a plan, scan for codes, and get a professional inspection. Each step removes some uncertainty and helps you avoid expensive surprises.
If at any point something feels wrong—the seller is pushy, the paperwork is messy, or the car behaves strangely—trust your instincts and walk away. There will always be another car, but recovering from a bad purchase is much harder. Use this guide as your checklist, take your time, and you’ll be far more likely to end up with a reliable used car that fits both your needs and your budget.
How do you rate this guide?
Related Posts


Comments have been disabled.
