Steering Wheel Vibration While Braking: Causes, Diagnosis & Fixes Before It Gets Dangerous
If your steering wheel shakes when you hit the brakes, don’t ignore it. Learn the most common causes, how to diagnose them at home, and when it’s time for a pro before it becomes a safety problem....

If your steering wheel vibrates or shakes when you step on the brake pedal, your car is telling you something important. It might feel like a mild buzz at 40 mph or a serious wobble when you slow from highway speeds. Either way, it’s a symptom you should take seriously, because it usually points to a problem in your brake or suspension system that can get worse—and more expensive—if ignored.
- 1. Is Steering Wheel Vibration While Braking Dangerous?
- 2. Common Symptoms You Might Notice
- 3. Top Causes of Steering Wheel Vibration While Braking
- 3.1. 1. Warped or Uneven Front Brake Rotors
- 3.2. 2. Sticking or Uneven Front Brake Calipers
- 3.3. 3. Worn Front Suspension or Steering Components
- 3.4. 4. Wheel and Tire Issues That Show Up Under Braking
- 3.5. 5. Rear Brake Problems Transmitted to the Front
- 4. Quick Safety Checks Before You Drive Far
- 5. How to Diagnose Steering Wheel Vibration While Braking
- 5.1. Step 1: Narrow Down the Conditions
- 5.2. Step 2: Visual Inspection of Front Brakes (Wheels On)
- 5.3. Step 3: Check for Wheel and Tire Issues
- 5.4. Step 4: Jack It Up Safely and Check for Play
- 5.5. Step 5: Inspect Rotors and Pads (Wheels Off)
- 6. Common Fixes for Steering Wheel Vibration While Braking
- 6.1. 1. Replace Warped or Worn Front Brake Rotors and Pads
- 6.2. 2. Service or Replace Sticking Front Calipers
- 6.3. 3. Repair Worn Suspension or Steering Components
- 6.4. 4. Balance, Rotate, or Replace Tires and Wheels
- 6.5. 5. Address Rear Brake Issues
- 7. When to DIY and When to See a Pro
- 8. How to Prevent Steering Wheel Vibration From Coming Back
- 9. Bottom Line
This guide breaks down, in plain language, what causes steering wheel vibration while braking, how to do basic diagnosis at home, and which fixes are realistic for DIYers versus what should go straight to a professional.
Is Steering Wheel Vibration While Braking Dangerous?


Most of the time, a shaking steering wheel under braking is not an immediate “pull over now” emergency, but it is a safety issue. Common problems like warped brake rotors or worn suspension parts can:
- Increase stopping distance
- Reduce steering control during hard braking
- Cause uneven tire wear and more vibration over time
- Lead to more expensive damage if left unfixed
If the vibration is severe, the car pulls hard to one side, or the brake pedal feels spongy or sinks to the floor, treat it as urgent: slow down, avoid high speeds, and schedule a brake inspection immediately.
Common Symptoms You Might Notice
Describing the exact symptom helps narrow down the cause. Pay attention to:
- Where you feel it: Mostly in the steering wheel, or also in the brake pedal and seat?
- When it happens: Only when braking? Only at higher speeds? When braking downhill?
- How strong it is: Light buzz vs. aggressive shaking or wobble.
- Any pulling: Does the car drift left or right when braking?
For this article, we’ll focus on the classic case: the steering wheel vibrates mainly when you apply the brakes, especially at moderate to high speeds.
Top Causes of Steering Wheel Vibration While Braking
1. Warped or Uneven Front Brake Rotors
This is the most common cause. Your brake rotors (discs) need to be flat and parallel. Over time they can develop thickness variation or slight warping from:
- Overheating from repeated hard braking or towing
- Improper wheel lug nut torque (over-tightened or unevenly tightened)
- Cheap or low-quality rotors that don’t handle heat well
- Rust buildup on the rotor surface from sitting unused
When the pads clamp down on a rotor that isn’t perfectly even, the brake force pulses as the wheel turns. Because the front brakes do most of the work, you feel this pulsing as a shaking steering wheel.
2. Sticking or Uneven Front Brake Calipers
Your brake calipers squeeze the pads against the rotors. If a caliper is sticking or the slide pins are seized, one pad may drag or clamp harder than the other. This causes:
- Uneven braking force side to side
- Steering wheel vibration, often with a pull to one side
- Burning smell or heat from one wheel after driving
Calipers can stick due to rust, torn dust boots, old brake fluid, or lack of lubrication on the slide pins.
3. Worn Front Suspension or Steering Components
Even if your brakes are in good shape, loose or worn suspension and steering parts can amplify normal brake forces into noticeable vibration. Common culprits include:
- Tie rod ends: Connect the steering rack to the wheels. Play here can cause wobble under braking.
- Ball joints: Allow the steering knuckle to pivot. Worn joints can clunk and shake.
- Control arm bushings: Rubber bushings that locate the control arm. When they crack or soften, the wheel can move back and forth as you brake.
- Wheel bearings: Excessive play can cause vibration that worsens under braking.
These issues often come with extra clues: clunks over bumps, wandering steering, or uneven tire wear.
4. Wheel and Tire Issues That Show Up Under Braking
Wheel and tire problems usually cause vibration even when you’re not braking, but braking can make them more noticeable. Possible issues include:
- Out-of-balance front wheels: Vibration at specific speeds that gets worse when braking.
- Bent wheel: From potholes or curbs; can cause a rhythmic shake, especially under load.
- Tire defects: Broken belts, bulges, or uneven wear can all cause vibration.
If you feel vibration both when coasting and braking, don’t rule out tires and wheels.
5. Rear Brake Problems Transmitted to the Front
Severely warped rear rotors or drums typically cause vibration felt more in the seat and brake pedal than the steering wheel, but the whole car can shake enough that you feel it in your hands too. If your car has rear drums, a warped drum or out-of-adjustment shoes can cause pulsing under braking.
Quick Safety Checks Before You Drive Far
Before diving into diagnosis, do a few quick checks in your driveway or parking lot:
- Walk-around inspection: Look for a flat or visibly damaged tire. Check for any obvious fluid leaks near the wheels.
- Wheel lug nuts: Make sure all are present and appear properly seated. Loose lugs can be extremely dangerous.
- Brake fluid level: Check the reservoir under the hood. Low fluid can indicate worn pads or a leak.
- Short test drive: In a safe area, gently brake from 25–30 mph and note exactly what you feel and where.
If anything seems severely wrong—metal grinding, strong pull to one side, or the pedal going to the floor—limit driving and arrange for a tow to a shop.
How to Diagnose Steering Wheel Vibration While Braking

You don’t need to be a pro mechanic to do some basic checks. Here’s a step-by-step approach suitable for beginners.
Step 1: Narrow Down the Conditions
On a safe road, pay attention to:
- Speed range: Does it happen only above 40 mph? At all speeds?
- Brake pressure: Light braking vs. medium vs. hard braking.
- Steering input: Straight-line braking vs. braking while turning.
Typical warped rotor symptom: Noticeable steering wheel shake during medium braking from 50–70 mph, less noticeable at low speeds, and not present when coasting.
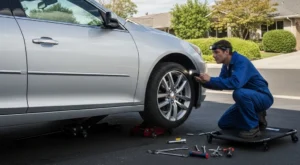
Step 2: Visual Inspection of Front Brakes (Wheels On)
You can see a lot without removing the wheels:
- Look through the wheel spokes with a flashlight.
- Check rotor surface: heavy grooves, rust ridges, or blue/purple heat spots are red flags.
- Look at pad thickness: if you can see the pads, they should have at least a few millimeters of friction material.
If one rotor looks much more discolored or rusty than the other, that side may have a sticking caliper or uneven braking.
Step 3: Check for Wheel and Tire Issues
Still with the car on the ground:
- Inspect tires for bulges, cuts, or uneven wear.
- Look for bent rims or obvious damage from potholes or curbs.
If you already know you have a vibration at certain speeds even when not braking, schedule a wheel balance and alignment check along with your brake inspection.
Step 4: Jack It Up Safely and Check for Play
If you’re comfortable using a jack and jack stands, you can do a more detailed check:
- Park on level ground, set the parking brake, and chock the rear wheels.
- Loosen front lug nuts slightly (do not remove yet).
- Jack up the front of the car and support it securely on jack stands.
- Grab each front wheel at 12 and 6 o’clock and rock it: play here can indicate a bad ball joint or wheel bearing.
- Grab at 3 and 9 o’clock and rock it: play here often points to tie rod or steering issues.
Any clunking or visible movement should be checked by a professional. Loose steering or suspension parts can make brake vibration worse and are a safety concern on their own.
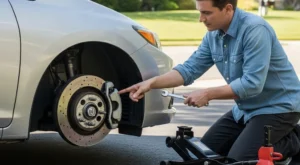
Step 5: Inspect Rotors and Pads (Wheels Off)
With the wheels removed (if you’re comfortable doing so):
- Look closely at the rotor surface. Light, even wear is normal; deep grooves, heavy rust, or obvious high/low spots are not.
- Check pads for even wear side to side. One pad worn much thinner than the other on the same caliper suggests a sticking slide or piston.
- Spin the rotor by hand (with the car in neutral and properly supported). You may feel a light drag from the pads, but it should be smooth and consistent.
Measuring rotor runout and thickness variation accurately requires a dial indicator and micrometer, which most DIYers don’t have. If the visual signs point to rotor issues, it’s usually more cost-effective to replace them than to try to machine them, especially on modern thin rotors.
Common Fixes for Steering Wheel Vibration While Braking
1. Replace Warped or Worn Front Brake Rotors and Pads
Best for: Vibration mainly when braking, rotors show heat spots, grooves, or rust ridges.
The most common and effective fix is to replace the front rotors and pads as a set on both sides:
- Use quality rotors that match or exceed OEM specs.
- Install new pads designed for your driving style (daily, towing, performance).
- Clean the hub surface thoroughly so the new rotor sits flat.
- Torque wheel lug nuts to the manufacturer’s spec in a star pattern.
For many vehicles, this is a realistic DIY job if you’re comfortable working with basic tools and follow a detailed brake replacement guide. If not, a reputable shop can do it in a couple of hours.
2. Service or Replace Sticking Front Calipers
Best for: Vibration plus pulling to one side, one wheel hotter than the other, uneven pad wear.
Fixes may include:
- Cleaning and lubricating caliper slide pins with high-temp brake grease
- Replacing torn rubber boots and hardware
- Replacing the entire caliper if pistons are seized or seals are damaged
- Flushing old brake fluid if it’s dark or contaminated
Caliper work is more advanced DIY territory. If you’re not fully confident, have a shop handle it—brakes are not the place to experiment.
3. Repair Worn Suspension or Steering Components
Best for: Vibration plus clunks over bumps, loose steering feel, or uneven tire wear.
Depending on what’s worn, the fix might involve:
- Replacing tie rod ends and getting an alignment
- Replacing ball joints or control arm assemblies
- Installing new control arm bushings
- Replacing worn wheel bearings
Many of these jobs require special tools and a follow-up alignment. They’re often best left to a professional, especially on modern cars with complex suspension designs.
4. Balance, Rotate, or Replace Tires and Wheels
Best for: Vibration present even when not braking, visible tire or wheel damage.
A tire shop can:
- Balance all four wheels
- Rotate tires front to rear to see if the symptom changes
- Inspect for bent rims or internal tire damage
If the vibration changes or moves after rotation, that’s a strong clue that a tire or wheel is part of the problem.
5. Address Rear Brake Issues
Best for: Vibration felt more in the seat and pedal, whole-car shaking under braking.
Fixes may include:
- Replacing rear rotors and pads or rear drums and shoes
- Adjusting rear drum brakes properly
- Flushing old brake fluid
Even though rear brakes don’t usually cause steering wheel shake by themselves, they can contribute to overall brake vibration and should be kept in good condition.
When to DIY and When to See a Pro
DIY-friendly tasks (for careful beginners with tools):
- Visual inspections of brakes, tires, and suspension
- Basic front pad and rotor replacement (with a detailed guide and safety precautions)
- Cleaning and lubricating caliper slide pins
Best left to a professional:
- Diagnosing and replacing worn suspension and steering components
- Caliper rebuilds or replacements if pistons are seized
- Wheel bearing replacement
- Brake system bleeding with ABS systems if you’re not experienced
- Wheel alignment and advanced tire diagnostics
How to Prevent Steering Wheel Vibration From Coming Back
Once you’ve fixed the problem, a few habits can help keep your steering wheel smooth:
- Use proper torque on lug nuts: Always tighten in a star pattern with a torque wrench to the specified value.
- Avoid repeated hard braking: Especially when towing or driving in mountains; downshift to use engine braking when possible.
- Bed in new pads and rotors correctly: Follow the manufacturer’s break-in procedure to avoid uneven pad deposits.
- Rotate and balance tires regularly: Typically every 5,000–7,500 miles.
- Inspect suspension at each service: Catching worn parts early prevents vibration and uneven tire wear.
Bottom Line
A steering wheel that vibrates when you brake is more than an annoyance—it’s a warning sign. In many cases, the fix is straightforward: new front rotors and pads, properly installed and torqued. But it can also point to deeper issues with calipers, suspension, or tires that affect your car’s safety.
Don’t ignore the shake. Use the steps above to understand what your car is telling you, then decide whether it’s a job you can safely tackle yourself or one that deserves a professional inspection. Addressing it early will give you smoother stops, better control, and peace of mind every time you hit the brakes.
How do you rate this guide?
Related Posts

Comments have been disabled.
