Beginner’s Guide to Car Brake Maintenance: Simple Checks to Stay Safe and Avoid Costly Repairs
Learn simple, beginner-friendly brake maintenance checks you can do at home to stay safe, catch problems early, and avoid expensive repairs at the shop....

Your brakes are the most important safety system on your car, but they are also one of the easiest to ignore until something feels wrong. Basic brake maintenance is not just for enthusiasts or professional mechanics. With a few simple checks you can do in your driveway, you can spot issues early, stay safer, and avoid big repair bills.
- 1. How Your Car’s Brakes Work (In Simple Terms)
- 2. Common Warning Signs Your Brakes Need Attention
- 3. Safety First: How to Prepare for Brake Checks
- 4. Step-by-Step: Simple Brake Checks You Can Do at Home
- 4.1. 1. Check Brake Pedal Feel and Response
- 4.2. 2. Inspect Brake Fluid Level and Condition
- 4.3. 3. Look at Brake Pads and Rotors (Front Wheels)
- 4.4. 4. Listen and Feel During a Short Test Drive
- 5. Simple Brake Care Habits That Extend Life
- 6. When to Replace Brake Pads, Rotors, and Fluid
- 7. Basic Tools and Supplies for Beginner Brake Maintenance
- 8. How Often Should You Check Your Brakes?
- 9. Summary and Next Steps
This beginner-friendly guide walks you through what your brake system does, how to recognize early warning signs, and step-by-step checks you can perform without special tools.
How Your Car’s Brakes Work (In Simple Terms)
Most modern cars use hydraulic disc brakes on the front wheels and either disc or drum brakes on the rear. When you press the brake pedal, brake fluid pushes pistons in the calipers (or wheel cylinders in drums), squeezing brake pads or shoes against a spinning metal surface to slow the car.

Key parts you should know:
- Brake pedal: What you press with your foot to start the braking process.
- Master cylinder and brake lines: Use brake fluid to transfer your pedal force to each wheel.
- Brake pads and rotors (disc brakes): Pads clamp onto the rotor (disc) to create friction.
- Brake shoes and drums (drum brakes): Shoes press outward on the inside of a drum to slow it.
- Brake fluid: Special hydraulic fluid that must stay clean and at the right level.
You don’t need to be an expert in all the parts, but knowing the basics helps you understand what you’re looking at when you do your checks.
Common Warning Signs Your Brakes Need Attention
Before you even open the hood, your car will often tell you when the brakes need help. Pay attention to these warning signs during everyday driving.
- Squealing or screeching when braking: Often caused by wear indicators on the pads touching the rotor. This is an early warning that pads are getting thin.
- Grinding noise: A harsh metal-on-metal sound usually means the pads are worn out and the metal backing is digging into the rotor. This is serious and can quickly become expensive.
- Soft or spongy pedal: The pedal sinks more than usual or feels squishy. This can mean air in the brake lines, moisture-contaminated fluid, or a failing component.
- Vibration or pulsing when braking: The steering wheel or brake pedal shakes when you slow down, especially from highway speeds. Often caused by warped rotors or uneven pad deposits.
- Car pulls to one side when braking: One side may be braking harder than the other due to a sticking caliper, uneven pad wear, or a hydraulic issue.
- Burning smell after heavy braking: Overheated brakes, which can lead to fade and reduced stopping power.
- Brake warning light on the dash: May indicate low fluid, worn pads (on some cars), or a more serious system fault. If your check engine light is also on, use a structured approach like in Mastering the Check Engine Light to prioritize what to handle first.
If you notice grinding, a very soft pedal, or the brake warning light staying on, treat it as urgent. Avoid highway speeds and get the car inspected as soon as possible.
Safety First: How to Prepare for Brake Checks
Brake checks are simple, but you still need to be safe. You’ll be near moving parts and possibly under the car, so set things up properly before you start.
Basic safety steps:
- Park on level ground. Avoid slopes. Engage the parking brake (unless you’re working on rear drum brakes and need it released).
- Put the car in Park (or in gear for manuals). Turn off the engine and remove the key.
- Use wheel chocks. Place blocks or chocks behind the wheels that will stay on the ground to prevent rolling.
- Let brakes cool. If you just drove, give brakes at least 20–30 minutes to cool before touching rotors or drums.
- Wear safety gear. Gloves and safety glasses protect you from dust and accidental fluid splashes.
If you need to remove wheels, always use a proper jack and jack stands. Never rely on a jack alone to support the car.
Step-by-Step: Simple Brake Checks You Can Do at Home
These checks are designed for beginners and don’t require advanced tools. A flashlight and a basic jack and lug wrench (often supplied with the car) are usually enough.
1. Check Brake Pedal Feel and Response
This is the easiest test and you can do it in your driveway without tools.
- With the engine off, press the brake pedal several times. It should feel firm and get harder as you pump it.
- Start the engine while holding light pressure on the pedal. The pedal should drop slightly as the brake booster engages. This is normal.
- Hold steady pressure. The pedal should stay in place and not slowly sink to the floor.
What to watch for:
- Pedal slowly sinking: Possible internal leak in the master cylinder or a hydraulic problem. This is serious and needs a mechanic.
- Pedal very hard with poor braking: Possible brake booster or vacuum issue.
- Pedal very soft or goes to the floor: Possible fluid leak or air in the system. Do not drive until inspected.
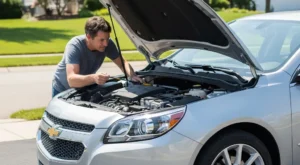
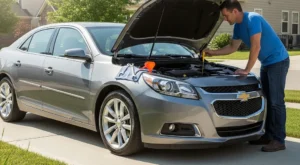
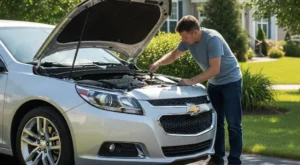
2. Inspect Brake Fluid Level and Condition
Brake fluid is critical and often overlooked. Old, contaminated fluid can cause poor braking and internal corrosion.
- Open the hood and locate the brake fluid reservoir. It’s usually on the driver’s side firewall, a small translucent container with a cap labeled “Brake Fluid” or similar.
- Check the level against the “MIN” and “MAX” marks. The fluid should be between these lines.
- Look at the fluid color. Fresh fluid is usually clear to light amber. Dark brown or nearly black fluid suggests it’s overdue for replacement.
What to watch for:
- Low fluid level: Can indicate worn pads (normal over time) or a leak (not normal). If you need to add fluid frequently, have the system checked.
- Very dark fluid: Time for a brake fluid flush. Many manufacturers recommend changing fluid every 2–3 years; check your owner’s manual or resources like official manufacturer maintenance schedules for specifics.
- Wetness around the reservoir or lines: Possible leak that needs professional attention.
Only top up with the exact fluid type specified in your owner’s manual (DOT 3, DOT 4, etc.). Mixing the wrong type can damage seals and reduce braking performance.
3. Look at Brake Pads and Rotors (Front Wheels)
You can often see the front brake pads and rotors through the wheel spokes. For a better view, you may need to remove the wheel.
- Turn the steering wheel fully left or right. This can give you a better angle to see the caliper and pads.
- Use a flashlight to look through the wheel. Identify the rotor (large metal disc) and the caliper (clamp-like part). The pads sit inside the caliper.
- Look at pad thickness. You should see at least a few millimeters of friction material (not just the metal backing plate).
What to watch for:
- Very thin pads (about 3 mm or less): Time to plan a brake job soon.
- Uneven pad wear: One pad much thinner than the other can indicate a sticking caliper or guide pin.
- Rotor surface condition: Light, even wear is normal. Deep grooves, heavy rust, or blue/purple discoloration suggest overheating or neglect.
If you’re comfortable removing wheels, you can repeat this check with the wheel off for a clearer view. Always support the car with jack stands before removing any wheel.
4. Listen and Feel During a Short Test Drive
A careful test drive can reveal issues you might not see visually.
- Drive at low speed (10–20 mph) in a safe, empty area. Gently apply the brakes and listen.
- Increase to moderate speed (30–40 mph). Brake a bit more firmly and pay attention to noise, vibration, and straight-line stability.
- Perform a firm stop from moderate speed. Make sure the road behind you is clear and you’re in a safe area.
What to watch for:
- High-pitched squeal: Early warning of pad wear or dust buildup.
- Grinding noise: Stop driving and schedule service immediately.
- Pulsation in pedal or steering wheel: Possible warped rotors.
- Car pulling to one side: Uneven braking or tire issues. If you also feel hesitation when accelerating, see the guide on car hesitates when accelerating from a stop to rule out engine or transmission problems.
Simple Brake Care Habits That Extend Life
Beyond inspections, how you drive and maintain your car has a huge impact on brake life and safety. These habits are easy to adopt and can save you money.
- Drive smoothly. Anticipate stops, coast when possible, and avoid hard braking whenever you can. This reduces heat and wear on pads and rotors.
- Avoid riding the brakes downhill. Use lower gears to help control speed on long descents instead of constant light braking.
- Keep your car’s weight reasonable. Extra cargo or roof boxes increase braking distance and wear.
- Rotate tires and maintain correct pressure. Even tire wear helps keep braking balanced and predictable. For tire care and emergency punctures, see DIY flat tire repair for beginners.
- Rinse wheels in winter. Road salt and grime can accelerate corrosion on brake components. A simple rinse helps.
- Follow fluid change intervals. Regular brake fluid flushes prevent internal corrosion and maintain pedal feel.
When to Replace Brake Pads, Rotors, and Fluid
Exact replacement intervals depend on how and where you drive, but you can use these general guidelines along with your inspections.
- Brake pads: Often last 25,000–60,000 miles. Replace when friction material is around 3 mm thick or when you hear consistent squealing from wear indicators.
- Brake rotors: May last through 1–2 sets of pads, but can need replacement sooner if warped, deeply grooved, or below minimum thickness. A shop can measure rotor thickness for you.
- Brake fluid: Typically every 2–3 years regardless of mileage, because it absorbs moisture over time. Dark, dirty fluid is another sign it’s due.
Always consult your owner’s manual for manufacturer recommendations, and ask your shop to show you old parts (pads, rotors) so you can see wear for yourself. This helps you learn what “worn” really looks like on your specific car.
Basic Tools and Supplies for Beginner Brake Maintenance
You don’t need a full toolbox to perform basic brake checks, but a few items make the job safer and easier.
- Flashlight or headlamp: Essential for seeing pads, rotors, and fluid clearly.
- Jack and jack stands: For safely lifting and supporting the car if you need to remove wheels.
- Lug wrench: To remove wheel nuts.
- Gloves and safety glasses: Protect your hands and eyes from dust and fluid.
- Brake cleaner spray: Helpful for cleaning visible dust and grime from calipers and rotors (follow label safety instructions).
- Shop towels or rags: For wiping spills and keeping things clean.
If you decide to move beyond inspections into actual pad and rotor replacement, you’ll need additional tools like a torque wrench and caliper piston tool. For now, focus on inspections and understanding your system before tackling bigger DIY jobs.
How Often Should You Check Your Brakes?
Brake checks don’t need to be complicated or time-consuming. Build them into your regular maintenance routine so problems don’t sneak up on you.
- Quick visual and pedal check: Every month or before long trips.
- Brake fluid level and color: Every oil change.
- More detailed pad and rotor inspection: Every 6 months or whenever you rotate tires.
- Test drive focused on braking feel: Any time something feels “off” or you hear a new noise.
Pair these checks with other simple maintenance tasks, like cleaning your windshield and replacing wipers (see DIY wiper blade replacement for beginners), to keep your car safe and predictable in all conditions.
Summary and Next Steps
Basic brake maintenance is well within reach for beginners. By checking pedal feel, fluid condition, pad thickness, and listening during test drives, you can catch many issues early and avoid dangerous situations.
If you notice grinding, a soft or sinking pedal, fluid leaks, or the brake warning light stays on, treat it as urgent and have the car inspected by a professional right away. For everything else, keep up with your regular checks, follow your car’s maintenance schedule, and continue learning simple DIY tasks so you can stay safe and avoid costly surprises.
How do you rate this guide?
Related Posts
Comments have been disabled.
