Car Makes Rattling Noise Over Bumps: Causes, Diagnosis & Fixes
Hearing a rattling, clunking, or knocking noise every time you hit a bump? Learn the most common causes, how to diagnose them at home, and what it costs to fix a car that rattles over rough roads....

If your car makes a rattling, clunking, or knocking noise every time you hit a bump, don’t ignore it. Noises over bumps are more than just annoying – they’re often early warning signs that something is loose, worn, or about to fail in your suspension, steering, or exhaust system.
- 1. Is a Rattling Noise Over Bumps Dangerous?
- 2. Common Causes of Rattling or Clunking Over Bumps
- 2.1. 1. Loose Items in the Cabin or Trunk
- 2.2. 2. Worn Sway Bar Links and Bushings
- 2.3. 3. Worn Struts, Shocks, or Strut Mounts
- 2.4. 4. Worn Control Arm Bushings or Ball Joints
- 2.5. 5. Loose or Damaged Exhaust Components
- 2.6. 6. Broken or Sagging Coil Springs
- 2.7. 7. Loose Underbody Panels, Splash Shields, or Skid Plates
- 2.8. 8. Loose Steering Components (Tie Rods, Rack Mounts)
- 2.9. 9. Worn or Loose Engine and Transmission Mounts
- 3. Step-by-Step Diagnosis: How to Track Down Rattles Over Bumps
- 3.1. Step 1: Narrow Down the Location
- 3.2. Step 2: Reproduce the Noise Safely
- 3.3. Step 3: Do a Basic Visual Inspection
- 3.4. Step 4: Check for Play in Suspension and Steering
- 3.5. Step 5: Road Test After Each Repair
- 4. When to DIY and When to See a Mechanic
- 4.1. Good DIY Candidates
- 4.2. Best Left to a Professional
- 5. Preventing Future Rattles and Clunks
- 6. FAQ: Rattling Noise Over Bumps
- 6.1. Can I keep driving if my car rattles over bumps?
- 6.2. Why is the rattling worse in cold weather?
- 6.3. Is a rattling noise over bumps an automatic suspension problem?
- 6.4. Do I need an alignment after fixing rattling noises?
- 7. Bottom Line
This guide walks you through the most common causes of rattling over bumps, how to diagnose them at home, and what it usually costs to fix. Whether you drive a compact car, SUV, or pickup, the same basic principles apply.
Is a Rattling Noise Over Bumps Dangerous?


Sometimes it’s just a loose heat shield or plastic splash guard. Other times, it’s a worn ball joint or broken suspension component that can affect handling and safety.
Here’s a quick risk breakdown:
- Low risk, mostly annoying: loose interior trim, trunk items, exhaust heat shields, plastic underbody panels.
- Moderate risk: worn sway bar links, bushings, strut mounts, loose exhaust hangers.
- High risk (safety-related): worn ball joints, control arm bushings, broken springs, loose steering components.
If the rattling is accompanied by poor handling, wandering steering, or uneven tire wear, treat it as a safety issue and have it inspected as soon as possible.
Common Causes of Rattling or Clunking Over Bumps
Most bump-related noises come from a handful of systems. We’ll start with the most common and easiest to check.
1. Loose Items in the Cabin or Trunk
Before you assume the worst, rule out the simple stuff.
- Typical sound: light rattling, tapping, or thumping that changes as items move around.
- Common culprits: tools, bottles, strollers, jack kits, spare tire, cargo covers.
DIY check:
- Empty the glove box, door pockets, center console, and trunk.
- Check that the spare tire and jack are tightly secured.
- Test drive on the same bumpy road and listen for changes.
If the noise disappears, you’ve found your “fix” for free.
2. Worn Sway Bar Links and Bushings
The sway bar (stabilizer bar) helps control body roll. It’s connected to the suspension by small links and rubber bushings that wear out over time.
- Typical sound: sharp clunk or rattle when going over small bumps or potholes, often more noticeable at low speed.
- Symptoms: noise over bumps, slightly looser or more “floaty” handling in corners.
DIY check:
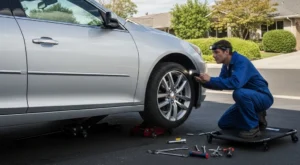
- Safely jack up the car and support it with jack stands.
- Locate the sway bar and its links near the lower control arms.
- Grab each link and try to move it by hand; there should be minimal play.
- Inspect rubber bushings for cracks, missing chunks, or excessive movement.
Typical repair cost:
- Sway bar links: $80–$250 for parts and labor (for both sides).
- Sway bar bushings: $80–$200 depending on access and vehicle.
3. Worn Struts, Shocks, or Strut Mounts
Struts and shocks control how your car absorbs bumps. When they wear out, they can cause rattles, clunks, and a bouncy ride.
- Typical sound: dull clunk or knocking over bumps, sometimes a metallic rattle from the top of the strut.
- Symptoms: excessive bouncing after bumps, nose dive when braking, uneven tire wear, less stable at highway speeds.
DIY check:
- Perform a “bounce test”: push down firmly on each corner of the car and release.
- If the car bounces more than 1–2 times, the shock/strut is likely worn.
- Look for oil leakage on the body of the shock or strut.
- Listen near the top of the strut tower for clunks when turning or going over bumps – worn strut mounts can rattle.
Typical repair cost:
- Shocks/struts (pair on one axle): $400–$1,000 including labor, depending on vehicle.
- Strut mounts: often replaced with struts; add $100–$300 if separate.
4. Worn Control Arm Bushings or Ball Joints
Control arms connect the wheel hub to the chassis. They pivot on bushings and ball joints that wear out, especially on higher-mileage or rough-road vehicles.
- Typical sound: solid clunk or knock over bumps, sometimes a creak when turning or braking.
- Symptoms: wandering steering, uneven tire wear, vague or unstable feel at speed.
DIY check (visual and basic play test):
- With the car safely lifted, inspect bushings for cracks, tears, or separation from the metal.
- Use a pry bar gently on the control arm to see if the bushing has excessive movement.
- For ball joints, grab the tire at 12 and 6 o’clock and rock it; any clunk or visible play may indicate wear (have a helper watch the joint).
Safety note: Severely worn ball joints can fail and cause loss of control. If you suspect play here, have a professional inspect it promptly.
Typical repair cost:
- Control arm with bushings and ball joint: $250–$700 per arm installed.
- Press-in bushings or ball joints: labor-intensive; $200–$600 per side.
5. Loose or Damaged Exhaust Components
The exhaust system runs under the car and is held up by rubber hangers and brackets. When these fail, the exhaust can rattle or bang against the body or suspension.
- Typical sound: metallic rattle, buzzing, or clanking over bumps; sometimes a constant rattle at certain RPMs.
- Common culprits: loose heat shields, broken exhaust hangers, rusted clamps or brackets.
DIY check:
- With the car cool and safely lifted, gently shake the exhaust pipes and muffler.
- Listen for metal-on-metal contact or see if parts hit the body or suspension.
- Inspect thin metal heat shields around the catalytic converter and muffler for loose or missing fasteners.
Typical repair cost:
- Reattaching or clamping a loose heat shield: $40–$150.
- Replacing exhaust hangers or small brackets: $80–$250.
- Rusty exhaust sections: $200–$1,000+ depending on parts replaced.
6. Broken or Sagging Coil Springs
Coil springs support the weight of the vehicle. On older or rust-prone cars, they can crack or break, especially near the ends.
- Typical sound: sharp clunk or metallic snap over bumps, sometimes followed by a constant rattle as the broken piece moves.
- Symptoms: one corner of the car sits lower, uneven ride height, harsh ride over bumps.
DIY check:
- Visually inspect each spring for cracks, missing chunks, or coils touching each other.
- Compare the height of each corner of the car on level ground.
Typical repair cost:
- Coil spring replacement (pair on one axle): $300–$800 including labor.
- Often replaced together with struts or shocks for best results.
7. Loose Underbody Panels, Splash Shields, or Skid Plates
Modern vehicles use plastic shields and panels under the engine and along the floor for aerodynamics and protection. When clips or bolts break, they can flap or rattle over bumps.
- Typical sound: plastic flapping, tapping, or rattling, especially at certain speeds or over rough surfaces.
- Symptoms: noise changes with speed and wind, sometimes worse on the highway.
DIY check:
- Crawl under the front bumper and along the sides (with the car safely parked and engine off).
- Gently tug on plastic panels and shields; they should feel secure.
- Look for missing screws, broken clips, or cracked mounting points.
Typical repair cost:
- Replacing clips/fasteners: $10–$50 DIY, $50–$150 at a shop.
- Replacing a damaged shield: $100–$400 depending on part and labor.
8. Loose Steering Components (Tie Rods, Rack Mounts)
While most steering issues show up as play in the wheel or wandering, they can also cause clunks over bumps.
- Typical sound: dull clunk or knock, often when hitting a bump while turning or changing direction.
- Symptoms: loose steering feel, steering wheel play, vehicle pulling or wandering.
DIY check (basic):
- With the front wheels off the ground, grab each tire at 3 and 9 o’clock and rock it.
- Excessive play may indicate worn tie rod ends or steering rack issues.
- Have a helper turn the steering wheel slightly left and right while you watch the tie rods and rack for delayed movement or clunks.
Typical repair cost:
- Tie rod ends: $150–$400 for parts, labor, and alignment.
- Steering rack mounts or rack replacement: $600–$1,500+ depending on vehicle.
9. Worn or Loose Engine and Transmission Mounts
Engine and transmission mounts isolate vibration from the cabin. When they wear out or break, the drivetrain can shift and clunk over bumps.
- Typical sound: thump or clunk when going over bumps, shifting from drive to reverse, or accelerating/braking.
- Symptoms: excessive vibration at idle, engine movement when revving in park, harsh engagement when shifting.
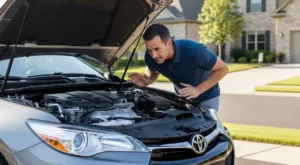
DIY check:
- With the hood open and parking brake firmly set, have a helper shift from park to drive and reverse while you watch the engine.
- Excessive rocking or banging against stops suggests worn mounts.
- Visually inspect mounts for torn rubber or collapsed sections.
Typical repair cost:
- Single mount: $200–$500 installed.
- Full set of mounts: $500–$1,200 depending on vehicle and access.
Step-by-Step Diagnosis: How to Track Down Rattles Over Bumps
Because many components can cause similar noises, it helps to follow a structured approach instead of guessing and throwing parts at the problem.
Step 1: Narrow Down the Location
- Front vs rear: Does the noise seem to come from the front, rear, or middle?
- Left vs right: Is it louder on one side, especially when that side hits a bump?
- Speed-related: Does it happen only at low speed, or also at highway speeds?
Have a passenger help listen from different seats to pinpoint the area.
Step 2: Reproduce the Noise Safely
- Drive slowly over a known bumpy road or speed bump.
- Test with and without braking over the bump (some noises show up only when the suspension is loaded).
- Try gentle left-right steering inputs over rough pavement to see if the noise changes.
Step 3: Do a Basic Visual Inspection
- Check for obvious loose or hanging parts under the car.
- Look at shocks/struts for leaks and broken mounts.
- Inspect sway bar links, bushings, and control arm bushings.
- Check exhaust hangers and heat shields.
While you’re under the car, it’s also a good time to glance at fluid levels and leaks. For a deeper dive into keeping fluids in top shape, see the Complete Fluid Maintenance Guide: Intervals, DIY Checks & Costly Mistakes to Avoid.
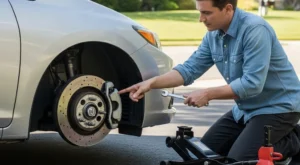
Step 4: Check for Play in Suspension and Steering
- Lift each corner of the car with a jack and support it securely with stands.
- Rock the wheel at 12 and 6 o’clock (for ball joints and bearings) and at 3 and 9 o’clock (for tie rods).
- Listen and feel for clunks or movement.
- Use a pry bar gently on control arms and sway bar links to check for excessive play.
Step 5: Road Test After Each Repair
If you replace a suspected part, always test drive on the same road where the noise was most noticeable. Some cars have multiple worn components, and you may need to address more than one issue to fully eliminate the rattling.
When to DIY and When to See a Mechanic

Some rattles are easy DIY fixes; others are better left to a professional.
Good DIY Candidates
- Securing loose interior or trunk items.
- Replacing sway bar links and bushings (on many vehicles).
- Reattaching exhaust heat shields or replacing simple exhaust hangers.
- Replacing plastic clips and underbody panel fasteners.
Best Left to a Professional
- Ball joint, control arm, and major suspension work.
- Coil spring replacement (requires spring compressors and experience).
- Steering rack or tie rod replacement and alignment.
- Engine and transmission mount replacement on tightly packaged vehicles.
Many shops offer a suspension and steering inspection for a modest fee, which can save you money by pinpointing the exact cause instead of guessing.
Preventing Future Rattles and Clunks
You can’t avoid every pothole, but you can reduce the chances of developing new noises.
- Slow down for rough roads: Less impact means less stress on suspension and exhaust components.
- Keep up with maintenance: Regular inspections during oil changes can catch worn bushings or loose parts early.
- Address warning signs: If you notice flickering dash lights, odd vibrations, or other electrical issues along with noises, it may point to broader problems. Learn more in Dashboard Lights Flickering While Driving – Causes, Diagnosis & Fixes.
- Maintain brakes and wheel hardware: Loose caliper bolts or hardware can also cause clunks. A solid brake maintenance routine helps prevent this; see the Complete Guide to Preventive Brake Maintenance: Intervals, DIY Checks & Costly Mistakes to Avoid.
- Wash the undercarriage in winter: Salt accelerates rust on springs, control arms, and exhaust components.
FAQ: Rattling Noise Over Bumps
Can I keep driving if my car rattles over bumps?
If the car still tracks straight, brakes normally, and the noise is mild, you can usually drive short-term. But because some causes are safety-related, you should have it inspected soon – especially if the noise is getting worse or you notice changes in handling.
Why is the rattling worse in cold weather?
Rubber bushings and mounts stiffen in the cold, making play and gaps more noticeable. Metal also contracts slightly, which can increase clearance between worn parts and amplify rattles.
Is a rattling noise over bumps an automatic suspension problem?
Not always. While suspension is a top suspect, exhaust, underbody panels, interior components, and even engine mounts can all cause similar noises. That’s why a systematic inspection is important.
Do I need an alignment after fixing rattling noises?
If the repair involves control arms, tie rods, struts, or anything that affects wheel angles, you should get an alignment. For simple repairs like sway bar links, exhaust hangers, or underbody panels, an alignment is generally not required.
Bottom Line
A car that rattles or clunks over bumps is telling you something is loose, worn, or out of place. Sometimes it’s as simple as a loose heat shield or trunk tool kit; other times it’s a worn suspension or steering component that can affect safety.
By narrowing down the location, performing basic checks, and addressing issues early, you can restore a quiet, solid ride and avoid more expensive repairs down the road. If you’re ever unsure whether a noise is safe to ignore, err on the side of caution and have a qualified mechanic take a look.
How do you rate this guide?
Related Posts
Comments have been disabled.
