Beginner’s Guide to Coolant Flush and Radiator Maintenance: Prevent Overheating Before It Starts
Learn how your cooling system works, when to flush coolant, and how to safely maintain your radiator so you can prevent overheating and expensive engine damage....

Your engine creates a huge amount of heat every time you drive. The only reason it does not destroy itself is because the cooling system constantly carries that heat away. If your coolant is old, low, or contaminated, overheating can happen fast and lead to warped cylinder heads, blown head gaskets, or even a ruined engine.
- 1. How Your Cooling System Works (and Why Coolant Flushes Matter)
- 2. When Should You Flush Your Coolant?
- 2.1. Common Signs Your Coolant Needs Service
- 3. Tools and Supplies You Need for a Basic Coolant Drain-and-Fill
- 4. Step-by-Step: Beginner-Friendly Coolant Drain-and-Fill
- 4.1. 1. Prepare the Car and Work Area
- 4.2. 2. Locate the Radiator, Reservoir, and Drain Points
- 4.3. 3. Safely Relieve Pressure and Open the System
- 4.4. 4. Drain the Old Coolant
- 4.5. 5. Optional: Distilled Water Rinse
- 4.6. 6. Refill with Fresh Coolant
- 4.7. 7. Bleed Air and Verify Operation
- 5. Basic Radiator and Cooling System Maintenance Checks
- 5.1. Quick Cooling System Inspection Checklist
- 6. Common Coolant and Radiator Problems Beginners Should Watch For
- 6.1. 1. Slow Coolant Loss Without Visible Leaks
- 6.2. 2. Overheating in Traffic but Not on the Highway
- 6.3. 3. Overheating at Highway Speeds
- 7. Safety Tips and Coolant Handling Mistakes to Avoid
- 8. Summary and Next Steps
This beginner-friendly guide explains how the cooling system works, when to flush coolant, and how to perform a basic coolant drain-and-fill and radiator inspection at home. You will also learn when it is smarter to stop and call a professional instead of pushing your luck.
How Your Cooling System Works (and Why Coolant Flushes Matter)


The cooling system circulates coolant (also called antifreeze) through the engine and radiator. As coolant flows through the engine, it absorbs heat. Then it travels to the radiator, where air passing through the fins removes that heat before the coolant returns to the engine.
Modern coolant is a mix of water and antifreeze with corrosion inhibitors and lubricants for the water pump. Over time, these additives break down. Old coolant can become acidic, lose its freeze and boil-over protection, and start corroding metal surfaces inside the engine and radiator. A coolant flush replaces this worn-out fluid before it causes problems.
Neglecting coolant changes can lead to clogged radiator passages, sticking thermostats, leaking heater cores, and water pump failures. All of these raise engine temperatures and increase the risk of overheating, especially in hot weather or when towing.
When Should You Flush Your Coolant?
The right coolant flush interval depends on the type of coolant and your vehicle. Many modern long-life coolants are rated for 5 years or 100,000+ miles, while older green coolants may need replacement every 2–3 years. Always check your owner’s manual for the exact interval recommended for your car.
Even if you are not at the mileage or time limit yet, there are warning signs that your coolant may need attention sooner.
Common Signs Your Coolant Needs Service
- Coolant looks rusty, brown, or cloudy: This often means corrosion or contamination inside the system.
- Oily film or sludge in the coolant reservoir: This can indicate serious internal issues, such as a head gasket problem, and needs professional diagnosis.
- Sweet smell under the hood or inside the cabin: Coolant has a sweet odor; if you smell it, you may have a leak.
- Coolant level keeps dropping: You may have an external leak (hose, radiator, water pump) or an internal leak.
- Engine temperature runs hotter than normal: The gauge is higher than usual, or warning messages appear, especially in traffic or on hills.
- Heater performance is weak: A partially clogged heater core or low coolant can cause poor cabin heat.
If you notice any of these, a coolant inspection and possible flush should move up your priority list. Do not ignore temperature warnings or steam from under the hood; overheating can damage the engine in minutes.
Tools and Supplies You Need for a Basic Coolant Drain-and-Fill
A full professional flush uses a machine to push fresh coolant through the system. At home, beginners can safely do a drain-and-fill, which replaces a large portion of the coolant and is usually enough for routine maintenance on a healthy system.
Gather these tools and supplies before you start:
- Owner’s manual (for coolant type, capacity, and drain locations)
- Correct coolant type (concentrate plus distilled water, or premixed)
- Drain pan (large enough to hold your system’s coolant capacity)
- Basic hand tools (screwdrivers, pliers, small socket set)
- Safety glasses and chemical-resistant gloves
- Funnel and clean measuring container
- Distilled water (if mixing concentrate or for a rinse)
- Rags or paper towels
- Floor protection (cardboard or drip mat)
Coolant is toxic to people and animals. Always keep it away from children and pets, and plan ahead for safe disposal at a recycling center or auto parts store that accepts used antifreeze.
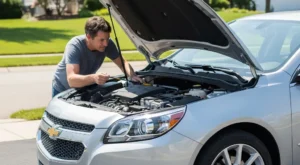
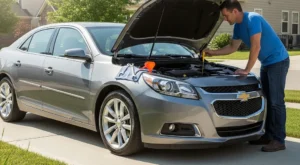
Step-by-Step: Beginner-Friendly Coolant Drain-and-Fill
These steps describe a typical front-engine, liquid-cooled vehicle. Always adapt to your specific car using the owner’s manual. If at any point you feel unsure, it is better to stop than to guess.
1. Prepare the Car and Work Area
- Park on a level surface. Set the parking brake and put the transmission in Park (or in gear for a manual).
- Let the engine cool completely. The radiator and hoses must be cool to the touch. Opening a hot system can cause severe burns.
- Protect the ground. Place cardboard or a drip mat under the front of the car to catch spills.
- Gather all tools and supplies. Once you open the system, you do not want to leave it unattended while you hunt for tools.
2. Locate the Radiator, Reservoir, and Drain Points
- Open the hood and find the coolant reservoir. This is usually a translucent plastic tank with “MIN” and “MAX” markings.
- Locate the radiator cap. It may be on the radiator itself or on a separate pressurized tank. Do not open it yet.
- Look for the radiator drain (petcock). It is typically at the bottom of the radiator, facing the engine or the ground. Some vehicles do not have one and require you to remove the lower radiator hose instead.
- Identify any engine block drains (optional). Beginners can usually skip block drains and just do a radiator drain-and-fill.
3. Safely Relieve Pressure and Open the System
- Double-check that the engine is cold. If there is any warmth in the upper radiator hose, wait longer.
- Slowly loosen the radiator cap. Turn it a quarter-turn at a time, listening for any hiss of pressure. If you hear it, pause until it stops, then continue.
- Remove the cap and set it aside. Place it somewhere clean so debris does not enter the system.
4. Drain the Old Coolant
- Position the drain pan. Place it under the radiator drain or lower hose connection.
- Open the radiator drain. Turn the petcock counterclockwise by hand or with pliers, or loosen the clamp and carefully pull off the lower radiator hose.
- Let the coolant flow completely. This may take several minutes. Watch for splashing and adjust the pan as needed.
- Inspect the drained coolant. Look for rust, debris, or oil-like layers. Heavy contamination or oily residue suggests deeper problems that a simple flush will not fix.
- Close the drain or reattach the hose. Make sure the petcock is snug but not overtightened, or the hose clamp is secure.
5. Optional: Distilled Water Rinse
If your drained coolant looked very dirty but you do not have a flush machine, a simple rinse can help dilute remaining contaminants.
- Install the radiator cap loosely. It should sit on the neck but not fully locked.
- Fill the system with distilled water. Pour slowly into the radiator or pressurized tank until full, then top off the reservoir to the “MAX” mark.
- Start the engine and run the heater on HOT. Let it idle until it reaches normal operating temperature. This opens the thermostat and circulates water through the whole system.
- Shut off the engine and let it cool completely. Once cool, drain the system again using the same method as before.
- Repeat once more if the water is still very dirty. Do not repeat endlessly; very contaminated systems may need professional cleaning or parts replacement.
6. Refill with Fresh Coolant
- Confirm the correct coolant type and mix. Your manual will specify the required coolant formula. If using concentrate, mix it with distilled water (commonly 50/50) in a clean container.
- Slowly fill the radiator or pressurized tank. Pour through a funnel to avoid spills. Fill until the coolant reaches the neck or specified level.
- Fill the reservoir to the “MAX” line. This allows for expansion as the engine warms up.
- Check for bleed screws. Some engines have air-bleed screws on the thermostat housing or coolant pipes. If equipped, follow the manual’s procedure to open them while filling until coolant (not air) comes out, then close.
7. Bleed Air and Verify Operation
- Reinstall the radiator cap. Make sure it is fully seated and locked.
- Start the engine and turn the heater to HOT. Set the fan on medium. This helps move coolant through the heater core.
- Let the engine idle. Watch the temperature gauge. It should rise to normal and then stabilize. Do not leave the car unattended.
- Check for leaks. Look around the radiator, hoses, drain plug, and water pump area for drips.
- After 10–15 minutes, shut off the engine. Allow it to cool completely, then recheck the coolant level in the reservoir and top off if needed.
Over the next few drives, keep an eye on the temperature gauge and coolant level. A small drop after the first heat cycle is normal as trapped air works its way out. Refill only when the engine is cool.
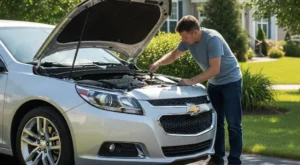
Basic Radiator and Cooling System Maintenance Checks

A coolant flush is only part of keeping your cooling system reliable. Simple visual checks can catch developing problems early and save you from roadside breakdowns.
Quick Cooling System Inspection Checklist
- Radiator exterior: Look through the grille at the radiator fins. They should be mostly straight and free of heavy dirt, leaves, or bugs. Lightly bent fins are common; severely crushed areas can restrict airflow.
- Radiator cap: Inspect the rubber seal for cracks or hardening. A weak cap can cause boiling and coolant loss.
- Hoses: Squeeze the upper and lower radiator hoses (when cool). They should feel firm but not rock-hard or mushy. Look for cracks, bulges, or wet spots at the ends.
- Coolant reservoir level: Check it monthly when the engine is cold. The level should stay between MIN and MAX. Mark the level with a pen and see if it drops over time.
- Cooling fans: With the engine at operating temperature and the A/C on, confirm that the radiator fans turn on and off as needed.
- Heater performance: On a cold day, the heater should blow warm air within a few minutes. Weak heat can be a sign of low coolant or a partially blocked heater core.
While you are under the hood, it is a good time to look at other basic maintenance items, such as your engine air filter condition. Keeping the whole engine bay in good shape helps the cooling system do its job.
Common Coolant and Radiator Problems Beginners Should Watch For
Not every cooling system issue can be solved with a simple flush. Some symptoms point to specific faults that may require parts replacement or professional diagnosis.
1. Slow Coolant Loss Without Visible Leaks
If the reservoir level keeps dropping but you do not see puddles under the car, you may have:
- Small hose or clamp leaks that only drip when hot.
- Leaking radiator end tanks (plastic tanks can crack with age).
- Heater core leaks, sometimes revealed by a sweet smell inside the cabin or foggy windows.
- Internal leaks such as a head gasket issue, often accompanied by white exhaust smoke, milky oil, or pressure in the cooling system after sitting overnight.
External leaks are often visible with a good flashlight. Internal leaks are more serious and should be checked by a trusted mechanic.
2. Overheating in Traffic but Not on the Highway
If your car runs cool at speed but overheats in stop-and-go traffic, suspect:
- Inoperative radiator fan (bad fan motor, relay, fuse, or temperature sensor).
- Restricted radiator fins from dirt, leaves, or damage.
- Weak radiator cap that cannot hold proper pressure.
Cleaning debris from the radiator face and verifying fan operation are beginner-friendly checks. Electrical diagnosis of fan circuits is often better left to someone with experience and the right tools.
3. Overheating at Highway Speeds
Overheating while cruising usually points to a deeper flow or engine load issue, such as:
- Partially clogged radiator that cannot pass enough coolant.
- Sticking thermostat that does not open fully.
- Failing water pump with worn impeller blades.
- Severe internal engine problems such as a head gasket failure.
These problems often show up together with other symptoms like loss of power, coolant pushed into the overflow tank, or heater performance changes. If you also feel vibrations or odd behavior when braking, it may be unrelated to the cooling system and instead tied to issues like those covered in steering wheel shake when braking or broader steering wheel vibrations and handling problems.
Safety Tips and Coolant Handling Mistakes to Avoid
Coolant work is not complicated, but there are a few common mistakes that can make it dangerous or ineffective.
- Never open a hot cooling system. Steam and boiling coolant can cause serious burns. Always wait until the engine is completely cool.
- Do not mix random coolant types. Mixing incompatible coolants can cause sludge and corrosion. If you must switch types, fully flush the system first.
- Use distilled water, not tap water. Tap water can introduce minerals that cause scale and deposits inside the radiator and engine.
- Keep coolant away from pets. Even small amounts can be fatal if ingested. Clean spills immediately and store containers securely.
- Dispose of old coolant properly. Most auto parts stores or local recycling centers accept used coolant. Never dump it on the ground or down a drain.
Summary and Next Steps
A basic coolant drain-and-fill and simple radiator inspection are well within reach for most beginners with a few tools and some patience. Keeping fresh coolant in the system and checking hoses, fans, and the radiator regularly will dramatically reduce your risk of overheating and expensive engine damage.
If you see signs of oil in the coolant, rapid coolant loss, repeated overheating, or you are simply not comfortable opening the cooling system, schedule an appointment with a trusted mechanic. Use this guide to ask informed questions and understand the work being done, and aim to make coolant and radiator maintenance a routine part of your overall car care plan.
How do you rate this guide?
Related Posts
Comments have been disabled.
