Beginner’s Guide to Basic Car Maintenance: Simple Monthly Checks to Prevent Expensive Repairs
Learn a simple, beginner-friendly monthly car maintenance routine you can do in under 30 minutes to catch problems early and avoid costly repairs....

Most major car repairs don’t happen overnight. They start as small, cheap-to-fix issues that grow into big, expensive problems when nobody is looking. A simple monthly maintenance routine can catch many of these early, even if you have zero mechanical experience.
- 1. Why Monthly Car Checks Matter (Even if You Don’t Drive Much)
- 2. Tools and Supplies for Basic Car Maintenance
- 3. Monthly Car Maintenance Checklist: 10 Simple Checks
- 3.1. 1. Walk-Around Inspection: Look, Listen, and Smell
- 3.2. 2. Check All Exterior Lights
- 3.3. 3. Tires: Pressure, Tread, and Overall Condition
- 3.4. 4. Engine Oil Level and Condition
- 3.5. 5. Coolant, Brake Fluid, and Power Steering Fluid (If Equipped)
- 3.6. 6. Windshield Washer Fluid and Wiper Condition
- 3.7. 7. Battery Terminals and Basic Electrical Check
- 3.8. 8. Belts and Hoses: Quick Visual Check
- 3.9. 9. Steering Feel and Brake Response
- 3.10. 10. Review Your Maintenance Log and Upcoming Services
- 4. How Long Should Basic Car Maintenance Take Each Month?
- 5. Common Red Flags You Shouldn’t Ignore
- 6. Summary and Next Steps
This guide walks you through a practical, beginner-friendly checklist you can do in about 20–30 minutes once a month. You don’t need special tools, a garage, or advanced knowledge—just a little time and consistency.
Why Monthly Car Checks Matter (Even if You Don’t Drive Much)
Many drivers wait for a warning light, strange noise, or breakdown before paying attention to their car. By then, damage may already be done. Monthly checks help you:

- Spot leaks and wear early before they damage expensive parts.
- Maintain fuel economy by keeping tires, fluids, and filters in good shape.
- Stay safer by making sure brakes, lights, and steering are working properly.
- Avoid surprise failures that leave you stranded or facing a big repair bill.
Think of this as a quick health check for your car. You’re not trying to be a mechanic—you’re just looking for obvious changes from one month to the next.
Tools and Supplies for Basic Car Maintenance
You can do almost all of this routine with a few inexpensive items. Keep them together in a small box or bag so your monthly check is easy to start.
- Paper towels or clean rags
- Flashlight or phone light
- Tire pressure gauge (digital or analog)
- Small notebook or notes app to record readings and dates
- Disposable gloves (optional but helpful)
It also helps to have your owner’s manual handy. It lists your correct tire pressures, fluid types, and service intervals. If you’re unsure about anything in this guide, your manual is the first place to check.
Monthly Car Maintenance Checklist: 10 Simple Checks
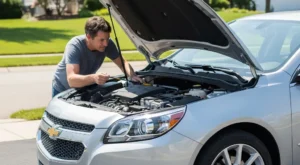
Do these checks in roughly this order once a month. Park on level ground, set the parking brake, and let the engine cool for at least 10–15 minutes before opening the hood.
1. Walk-Around Inspection: Look, Listen, and Smell
Start with a slow walk around the car. You’re looking for anything that seems different from last month.
- Check for leaks under the car. Look at the ground where you usually park. Note any fresh wet spots. Clear water under the passenger side after using the AC is usually normal condensation; oily, colored, or gasoline-smelling spots are not.
- Look at body damage and rust. Small chips or rust spots can grow quickly, especially in wet or salty climates. Note anything new.
- Check mirrors and glass. Look for new cracks or chips in the windshield and mirrors. Small chips are cheaper to repair than full cracks.
- Listen and smell. When you first start the car, notice any new smells (burning, fuel, strong exhaust) or unusual noises (squeals, rattles, grinding).
If you notice strong fuel smells, burning odors, or loud new noises, plan to have a mechanic inspect the car soon rather than waiting for the next monthly check.
2. Check All Exterior Lights
Working lights are critical for safety and to avoid tickets. You can do this alone, but it’s easier with a helper.
- Headlights: Turn on low beams, then high beams. Walk in front of the car and confirm both sides work.
- Turn signals and hazard lights: Activate left and right signals and then hazards. Check front and rear.
- Brake lights: Press the brake pedal and have someone stand behind the car to confirm all brake lights work. If you’re alone, back up to a wall or window at night and look for reflections.
- Reverse lights: With the parking brake on and your foot on the brake, shift into reverse just long enough to see if the white reverse lights come on (do not move the car).
If you find a dead brake light, follow a step-by-step bulb replacement guide like DIY Brake Light Bulb Replacement for Beginners to fix it quickly and cheaply.
3. Tires: Pressure, Tread, and Overall Condition
Tires are one of the most important and most ignored safety items. Underinflated or worn tires affect braking, handling, and fuel economy.
- Find the correct pressure. Look for a sticker on the driver’s door jamb or check your owner’s manual. Do not use the number on the tire sidewall—that’s a maximum rating, not the recommended pressure.
- Check each tire with a gauge. Remove the valve cap, press the gauge firmly, and read the number. Record each tire’s pressure.
- Adjust as needed. Add air if the pressure is low or release a little if it’s too high. Try to stay within 1–2 PSI of the recommended value.
- Inspect tread wear. Turn the steering wheel fully to one side to see the front tread better. Look for uneven wear (more worn on one edge, center, or in patches). Use the built-in tread wear bars or a coin; if the tread is getting close to the wear bars, it’s time to plan for new tires.
- Check sidewalls. Look for cracks, bulges, or cuts. Bulges and deep cuts are safety risks and need immediate attention.
If you notice vibration or shaking when accelerating, combine your tire checks with guidance from Car Shakes When Accelerating: Causes & Easy Fixes to decide if it’s tire-related or something more serious.
4. Engine Oil Level and Condition
Oil is your engine’s lifeblood. Running low or dirty for too long can cause serious damage. Checking it monthly is simple.
- Make sure the engine is off and cool. Park on level ground and wait at least 10–15 minutes after driving.
- Locate the dipstick. It usually has a bright-colored handle (yellow or orange). Your manual will show the exact location.
- Pull, wipe, reinsert, and read. Pull the dipstick out, wipe it clean, push it all the way back in, then pull it out again. The oil level should be between the “low” and “full” marks.
- Check color and smell. Fresh oil is usually amber or light brown. Very dark, gritty oil or burnt smells can mean it’s overdue for a change.
If the level is low, top up with the correct oil type listed in your manual. If you consistently need to add oil between changes, have a mechanic check for leaks or burning.
5. Coolant, Brake Fluid, and Power Steering Fluid (If Equipped)
You don’t need to open every cap; most modern cars have translucent reservoirs with “MIN” and “MAX” lines. Only open caps when the engine is cool.
- Coolant (antifreeze): Look at the reservoir tank, not the radiator cap. The level should be between the marks. Low coolant can lead to overheating and engine damage.
- Brake fluid: The reservoir is usually on the driver’s side near the back of the engine bay. The level should be near the “MAX” line. Slowly dropping brake fluid can indicate pad wear or a leak and should never be ignored.
- Power steering fluid: Some newer cars use electric power steering and have no fluid. If you have a reservoir, check that the level is within the marked range.
If any fluid is suddenly much lower than last month, don’t just top it up and forget it. A fast drop often means a leak that needs professional attention.
6. Windshield Washer Fluid and Wiper Condition
Good visibility is a safety issue, not just a convenience.
- Washer fluid: Open the washer fluid reservoir (usually marked with a windshield/water symbol). If you can’t see fluid near the top, add more until it reaches the fill line or is close to the top.
- Wiper blades: Lift each wiper arm off the glass. Run your fingers along the rubber (carefully) to feel for cracks, splits, or rough spots. If they smear or chatter during rain, plan to replace them soon.
Dirty cabin air can also cause foggy windows and poor defrost performance. For a simple related job, see DIY Cabin Air Filter Replacement: Breathe Cleaner Air and Stop Foggy Windows in 20 Minutes.
7. Battery Terminals and Basic Electrical Check
You don’t need to be an electrician to spot obvious battery problems. A quick look each month can prevent no-start situations.
- Visual battery check: With the engine off, look at the battery terminals. White, green, or blue crusty buildup is corrosion. Light corrosion can sometimes be gently cleaned; heavy buildup is a sign to have it serviced.
- Check for loose connections: Gently try to move each battery cable. They should be snug, not wiggling. Loose connections can cause intermittent electrical issues.
- Watch for slow cranking: If the engine cranks slowly or struggles to start, note it in your monthly log. That’s often an early sign of a weak battery or starter issue.
If the car ever refuses to start even though the battery seems fine, use a detailed guide like Car Won’t Start but the Battery Is Good: Electrical & Starter System Diagnosis Guide to narrow down the cause.
8. Belts and Hoses: Quick Visual Check
You don’t need to know what every belt and hose does. You just need to look for obvious damage.
- Belts: With the engine off, look at the visible rubber belts at the front of the engine. They should look smooth and solid. Cracks, missing chunks, or shiny glazed surfaces are warning signs.
- Hoses: Look at the larger rubber hoses carrying coolant and air. They should not be swollen, cracked, or leaking. Any wetness, crusty buildup, or strong coolant smell deserves attention.
Belts and hoses are usually replaced by time and mileage, but spotting visible damage early can prevent a roadside breakdown.
9. Steering Feel and Brake Response
Some issues only show up while driving. Use a short, calm test drive each month to notice changes.
- Steering: On a straight, flat road at low speed, lightly hold the wheel. The car should track mostly straight. Strong pulling to one side can indicate alignment or tire issues.
- Brakes: At low speeds, gently apply the brakes. They should feel firm and consistent, without grinding, squealing, or strong vibration. If the steering wheel shakes when braking, that may point to warped rotors or suspension issues.
- Noises: Turn the radio off for a minute. Listen for new clunks, thumps, or grinding sounds, especially over bumps or while turning.
For more detailed steering and braking problem diagnosis, you can later pair this simple monthly check with deeper guides focused on vibrations, noises, and handling issues.
10. Review Your Maintenance Log and Upcoming Services
A simple log turns random checks into a pattern you can track. It also helps you talk to a mechanic with clear information.
- Record the date and mileage. Note anything you topped up, any unusual readings, and new noises or smells.
- Check upcoming services. Look in your owner’s manual for mileage-based services like oil changes, transmission service, and brake inspections.
- Plan ahead. If you’re within 1,000–2,000 miles of a major service, plan when and where you’ll have it done so you’re not surprised later.
For more detailed information on recommended intervals, resources like manufacturer maintenance schedules on YourMechanic can give you a sense of what’s typical for your vehicle type and mileage.
How Long Should Basic Car Maintenance Take Each Month?
Once you’ve done this routine a couple of times, you can usually finish it in 20–30 minutes. Break it into two parts if that feels easier: do the walk-around, lights, and tires one day, then fluids and under-hood checks the next.
The key is consistency. A quick monthly check is far easier than dealing with a breakdown, tow truck, and unexpected repair bill because something simple was ignored for months or years.
Common Red Flags You Shouldn’t Ignore
While many small issues can wait for your next scheduled service, some warning signs deserve faster action. If you notice any of these during your monthly checks, don’t delay.
- Rapid fluid loss: Coolant, brake fluid, or oil dropping quickly from one month to the next.
- Strong burning, fuel, or rotten egg smells: These can indicate leaks, overheating components, or exhaust problems.
- Warning lights that stay on: Check engine, ABS, battery, or brake warning lights that don’t go away.
- Severe vibrations or thumping noises: Especially if they change with speed, as described in guides like Car Makes Thumping Noise That Speeds Up With the Car.
- Sudden changes in steering or braking: Pulling, fading brakes, or a steering wheel that feels loose or jerky.
These are signs that something more serious may be developing. Catching them early can prevent damage to expensive components like the transmission, engine, or braking system.
Summary and Next Steps
A basic car maintenance routine doesn’t require tools, a lift, or mechanical skills—just a monthly habit of looking, listening, and checking a few key items. By following this simple checklist, you’ll catch many problems while they’re still cheap and easy to fix.
If your monthly checks reveal rapid fluid loss, strong smells, warning lights, or major changes in how the car drives, schedule a professional inspection soon. For specific issues like hard shifting or shaking, pair your routine with focused guides such as Automatic Transmission Hard Shifts: Causes, Diagnosis & Fixes and Car Shakes When Accelerating: Causes & Easy Fixes.
Start with this month’s check, write down what you find, and repeat next month. Over time, you’ll get to know what’s normal for your car—and you’ll be far less likely to be surprised by an expensive repair.
How do you rate this guide?
Related Posts
Comments have been disabled.
