Battery Warning Light On While Driving: Causes, Safe-Driving Tips, Diagnosis & Fixes
If your battery warning light comes on while driving, you may have limited time before the car stalls. Learn what it really means, how to drive safely, and how to diagnose and fix charging system problems....

The battery warning light coming on while you are driving is not just an electrical nuisance. It is a direct warning that your car’s charging system may not be keeping the battery alive. If you ignore it, you could lose power steering, stall in traffic, or be stuck with a dead car that will not restart.
- 1. What the Battery Warning Light Really Means
- 2. Is It Safe to Keep Driving With the Battery Light On?
- 3. Immediate Safe-Driving Steps When the Battery Light Comes On
- 4. Common Causes of the Battery Warning Light
- 4.1. 1. Serpentine Belt Problems
- 4.2. 2. Alternator Failure
- 4.3. 3. Wiring and Connection Issues
- 4.4. 4. Weak or Failing Battery
- 5. Step-by-Step Diagnosis: Battery Light On While Driving
- 5.1. Step 1: Visual Inspection Under the Hood
- 5.2. Step 2: Basic Voltage Tests With a Multimeter
- 5.3. Step 3: Check Grounds and Main Cables
- 6. Common Fixes for a Battery Warning Light
- 6.1. 1. Replacing a Worn or Broken Serpentine Belt
- 6.2. 2. Replacing a Failed Alternator
- 6.3. 3. Cleaning and Repairing Battery Connections
- 6.4. 4. Replacing a Weak Battery
- 7. When the Battery Light Is Part of a Bigger Problem
- 8. Summary and Next Steps
This guide explains what the battery warning light really means, how to stay safe when it appears, and how to diagnose and fix the most common causes at home or with a mechanic.
What the Battery Warning Light Really Means


The battery symbol on your dashboard is often misunderstood. Many drivers think it only means the battery itself is bad. In reality, it is a charging system warning, not just a battery warning.
When the light comes on while driving, it usually means the alternator is not charging the battery properly. Your car is now running mostly or entirely on battery power, and that power is limited. Once the battery voltage drops too low, the engine can stall and electronics may shut down.
Key points to understand:
- Light on at startup, then off: Normal. The system passes its self-check.
- Light comes on and stays on while driving: Charging problem. You are on borrowed time.
- Light flickers with engine speed or bumps: Intermittent charging issue, often a loose belt, weak alternator, or poor connection.
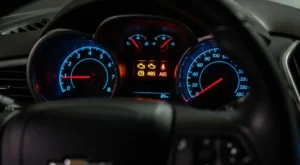
The battery light often appears along with other symptoms like dimming headlights, slow power windows, or the radio cutting out. If you also feel shaking or unusual vibrations, that may point to additional issues; see Car Vibrates While Driving – Causes, Diagnosis & Fixes for a separate diagnosis.
Is It Safe to Keep Driving With the Battery Light On?
How long you can drive with the battery light on depends on battery condition, electrical load, and engine speed. In many cases you may get anywhere from a few minutes to 30–60 minutes before the engine stalls, but there is no guarantee.
Use this checklist to decide your next move:
- Check for burning smells or smoke: If you smell burning rubber or see smoke from the engine bay, pull over and shut off the engine immediately. A seized alternator or slipping belt can overheat and cause damage.
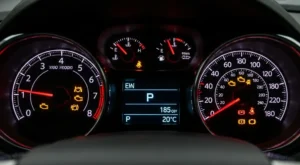
- Watch the temperature gauge: On some engines, the alternator belt also drives the water pump. If the belt breaks, the engine can overheat quickly. If the temp gauge climbs, pull over and shut down.
- Assess steering and braking: If steering suddenly becomes very heavy or the brake pedal feels different, you may have lost belt-driven power steering or vacuum assist. Slow down and move off the road safely.
- Check other warning lights: If multiple warning lights come on at once (ABS, airbag, traction control), it can be a sign of low system voltage. Do not push your luck; find a safe place to stop.
If the car is still driving normally and you are close to home or a repair shop, you may choose to continue driving briefly. However, avoid unnecessary stops, keep speeds moderate, and be prepared for a sudden loss of power.
Immediate Safe-Driving Steps When the Battery Light Comes On
When the battery light turns on while you are driving, treat it like a countdown timer. Here is a practical, step-by-step approach to stay safe and protect your car.
- Turn off non-essential electrical loads.
Switch off the radio, heated seats, rear defroster, and unnecessary interior lights. If it is safe, dim the climate fan. Reducing load helps the battery last longer. - Keep headlights on if needed for safety.
Do not turn off headlights at night or in poor visibility just to save power. Safety comes first. But avoid high beams unless necessary. - Plan your exit route.
Look for the nearest safe place to pull over or the closest repair shop. Avoid long detours, heavy traffic, or routes with no shoulder. - Avoid shutting the engine off until you are parked.
Once you turn the engine off, a weak battery may not restart the car. Keep it running until you are safely parked in a spot where a tow truck can reach you if needed. - Do not disconnect the battery while running.
Some old advice says to “test” the alternator by pulling a battery cable while the engine runs. On modern cars this can damage the engine computer and other electronics. Never do this. - Use hazard lights if voltage drops.
If the dash lights dim, gauges act strangely, or the engine begins to stumble, turn on your hazard lights and move to the shoulder as soon as it is safe.
Once you are parked in a safe location, you can perform some basic checks under the hood before deciding whether to call for a tow or attempt a simple fix.
Common Causes of the Battery Warning Light
Most battery warning light problems fall into a few categories: belt issues, alternator failure, wiring faults, or battery and connection problems. Understanding these helps you narrow down what is wrong.
1. Serpentine Belt Problems
The alternator is driven by a belt (often the serpentine belt) connected to the crankshaft pulley. If this belt slips, frays, or breaks, the alternator cannot spin fast enough to charge the battery.
- Typical signs: Squealing noise on startup, visible belt cracks, shiny glazed belt surface, or a missing belt.
- Risk: On many cars, this same belt also drives the water pump and power steering pump. A broken belt can cause overheating and heavy steering very quickly.
If the belt is missing or badly damaged, do not keep driving. The fix usually involves replacing the belt and, if needed, the belt tensioner or pulleys.
2. Alternator Failure
The alternator converts engine rotation into electrical power. When it fails, the battery is no longer recharged and the entire car runs on stored battery energy until it is depleted.
- Typical signs: Battery light on, dimming headlights at idle, electrical accessories acting up, whining or grinding noise from alternator area.
- Causes: Worn brushes, failed voltage regulator, bad bearings, or internal short circuits.
In many cases, the alternator must be replaced as a unit. Some shops can rebuild alternators, but for most DIYers, swapping in a quality new or remanufactured alternator is the practical fix.
3. Wiring and Connection Issues
Even if the alternator and belt are good, poor connections can prevent proper charging. Corroded battery terminals, loose ground straps, or damaged alternator wiring can all trigger the battery light.
- Typical signs: Intermittent battery light (flickers with bumps), visible green or white corrosion on battery posts, loose or frayed cables.
- Risk: High resistance connections can overheat, melt insulation, or cause voltage spikes that stress electronics.
Cleaning and tightening connections is often an easy DIY fix, but damaged cables or connectors may need replacement.
4. Weak or Failing Battery
A very weak battery can sometimes confuse the charging system and trigger the light, especially right after starting. However, a bad battery is more often the result of a charging problem than the cause.
- Typical signs: Slow cranking, clicking when you turn the key, battery older than 4–5 years, or repeated jump-starts needed.
- Note: If the battery light only comes on at startup and goes away quickly, it may be more of a battery health issue than a charging failure.
Testing the battery with a proper load tester (many parts stores offer this) will confirm whether it needs replacement.
Step-by-Step Diagnosis: Battery Light On While Driving

You do not need to be a professional mechanic to do some basic diagnostics. With a simple digital multimeter and a few visual checks, you can often pinpoint the problem.
Step 1: Visual Inspection Under the Hood
- Turn the engine off and remove the key.
Let moving parts stop completely before opening the hood. - Inspect the serpentine belt.
Look for cracks, missing chunks, glazing (shiny surface), or a belt that looks loose or off-center on the pulleys. If the belt is missing, do not attempt to drive the car. - Check the alternator area.
Look for obvious damage, broken mounting brackets, or signs of burning or melted plastic. Gently wiggle the alternator pulley (engine off) to feel for excessive play. - Examine battery terminals and cables.
Look for white or green corrosion, loose clamps, or frayed wires. Light corrosion can often be cleaned; severe corrosion or damaged cables should be replaced.
Step 2: Basic Voltage Tests With a Multimeter
If you have a digital multimeter, you can quickly check whether the alternator is charging.
- Measure battery voltage with the engine off.
Set the meter to DC volts and place the probes on the battery terminals (red to positive, black to negative). A healthy, fully charged battery should read about 12.4–12.7 volts. Below about 12.2 volts suggests a low or weak battery. - Start the engine and measure again.
With the engine idling, measure the voltage again. A properly working alternator usually produces around 13.8–14.5 volts. If the voltage stays near 12 volts or drops, the alternator may not be charging. - Turn on electrical loads.
Switch on headlights and the blower fan, then check voltage again. It should remain above about 13.5 volts on most cars. A big drop under load points to a weak alternator or poor connections.
If you are not comfortable doing these tests yourself, a local shop or parts store can often perform a quick charging system test for you.
Step 3: Check Grounds and Main Cables
- Inspect the main ground strap.
Find the heavy cable from the negative battery terminal to the body or engine block. Make sure it is tight and not corroded or broken. - Check the alternator output cable.
On most cars, a thick cable runs from the alternator to the battery or fuse box. Look for loose nuts, damaged insulation, or signs of overheating. - Gently tug on connectors.
Lightly pull on the alternator plug and battery cables. They should feel secure, not loose or wobbly.
Intermittent battery lights that come and go with bumps are often solved by fixing a loose ground or alternator connector.
Common Fixes for a Battery Warning Light
Once you have a good idea of what is wrong, you can decide whether it is a DIY job or better left to a professional. Here are the most common repairs.
1. Replacing a Worn or Broken Serpentine Belt
If the belt is worn, cracked, or missing, it must be replaced before you drive again.
- Locate the belt routing diagram.
Many cars have a diagram under the hood. If not, take a clear photo of the belt path before removal. - Release tension.
Use the appropriate wrench or ratchet on the tensioner pulley to relieve tension and slide the old belt off. - Install the new belt.
Route the new belt according to the diagram, leaving the easiest pulley for last. Double-check that the belt sits correctly in all grooves. - Reapply tension and inspect.
Release the tensioner slowly, then visually confirm that the belt is centered on each pulley.
If the tensioner or idler pulleys are noisy or wobbly, replace them at the same time to avoid repeat failures.
2. Replacing a Failed Alternator
Alternator replacement difficulty varies by vehicle, but the basic process is similar.
- Disconnect the battery.
Always remove the negative battery cable first to prevent shorts. - Remove the belt from the alternator pulley.
Release the belt tensioner and slip the belt off the alternator. - Disconnect wiring.
Unplug the alternator connector and remove the main output cable nut. Note the locations for reassembly. - Unbolt and remove the alternator.
Remove mounting bolts and carefully lift the alternator out. - Install the new alternator.
Position the new unit, install bolts, reconnect wiring, and reinstall the belt. Reconnect the battery last.
After replacement, start the engine and verify that the battery light is off and charging voltage is in the normal range. If the light remains on, double-check connections and fuses.
3. Cleaning and Repairing Battery Connections
Dirty or loose connections can mimic alternator failure and are often easy to fix.
- Disconnect the battery.
Remove the negative terminal first, then the positive. - Clean terminals and clamps.
Use a battery terminal brush or a wire brush to remove corrosion from both the posts and the inside of the clamps. - Inspect cables.
If the cable insulation is swollen, cracked, or corroded under the jacket, replace the cable. - Reassemble tightly.
Reinstall the positive terminal first, then the negative. Ensure both clamps are tight and do not move when you twist them by hand.
After cleaning, many intermittent battery light issues disappear, and starting performance often improves.
4. Replacing a Weak Battery
If testing shows the battery is weak or failing, replacement is straightforward on most vehicles.
- Record radio codes or settings if needed.
Some vehicles lose presets or require a code after battery removal. - Disconnect and remove the old battery.
Always remove the negative cable first, then positive, then any hold-down brackets. - Install the new battery.
Make sure the new battery matches the correct group size and terminal orientation. Secure it with the hold-down bracket. - Reconnect cables.
Connect positive first, then negative, and tighten both clamps securely.
If your battery died because of a charging problem, replacing the battery alone will not solve the root cause. Always verify that the alternator is charging properly after installing a new battery.
When the Battery Light Is Part of a Bigger Problem
Sometimes the battery light is only one symptom of a more complex issue. For example, if your car also hesitates or stumbles when accelerating, you may have both electrical and fuel/ignition problems. In that case, see Car Hesitates When Accelerating From a Stop: Causes, Diagnosis & Fixes for a focused drivability guide.
Likewise, if the transmission is acting up along with electrical issues, low system voltage can aggravate shifting problems, but it may not be the only cause. For persistent gear slipping or delayed shifts, review Automatic Transmission Slipping: Causes, Diagnosis & Fixes Before It Fails for a deeper transmission-specific diagnosis.
Summary and Next Steps
A battery warning light that comes on while driving is a serious charging system alert, not something to ignore until later. In many cases, the cause is a failing alternator, worn belt, or poor connection that can be diagnosed with basic tools and careful inspection.
Address the warning as soon as possible, reduce electrical load, and avoid driving long distances until you know what is wrong. If you are not comfortable working around high-current electrical components, or if the light returns after a repair, schedule a visit with a trusted mechanic. Catching charging system problems early can prevent stalling, protect expensive electronics, and keep you from being stranded with a dead car.
How do you rate this guide?
Related Posts

Comments have been disabled.
